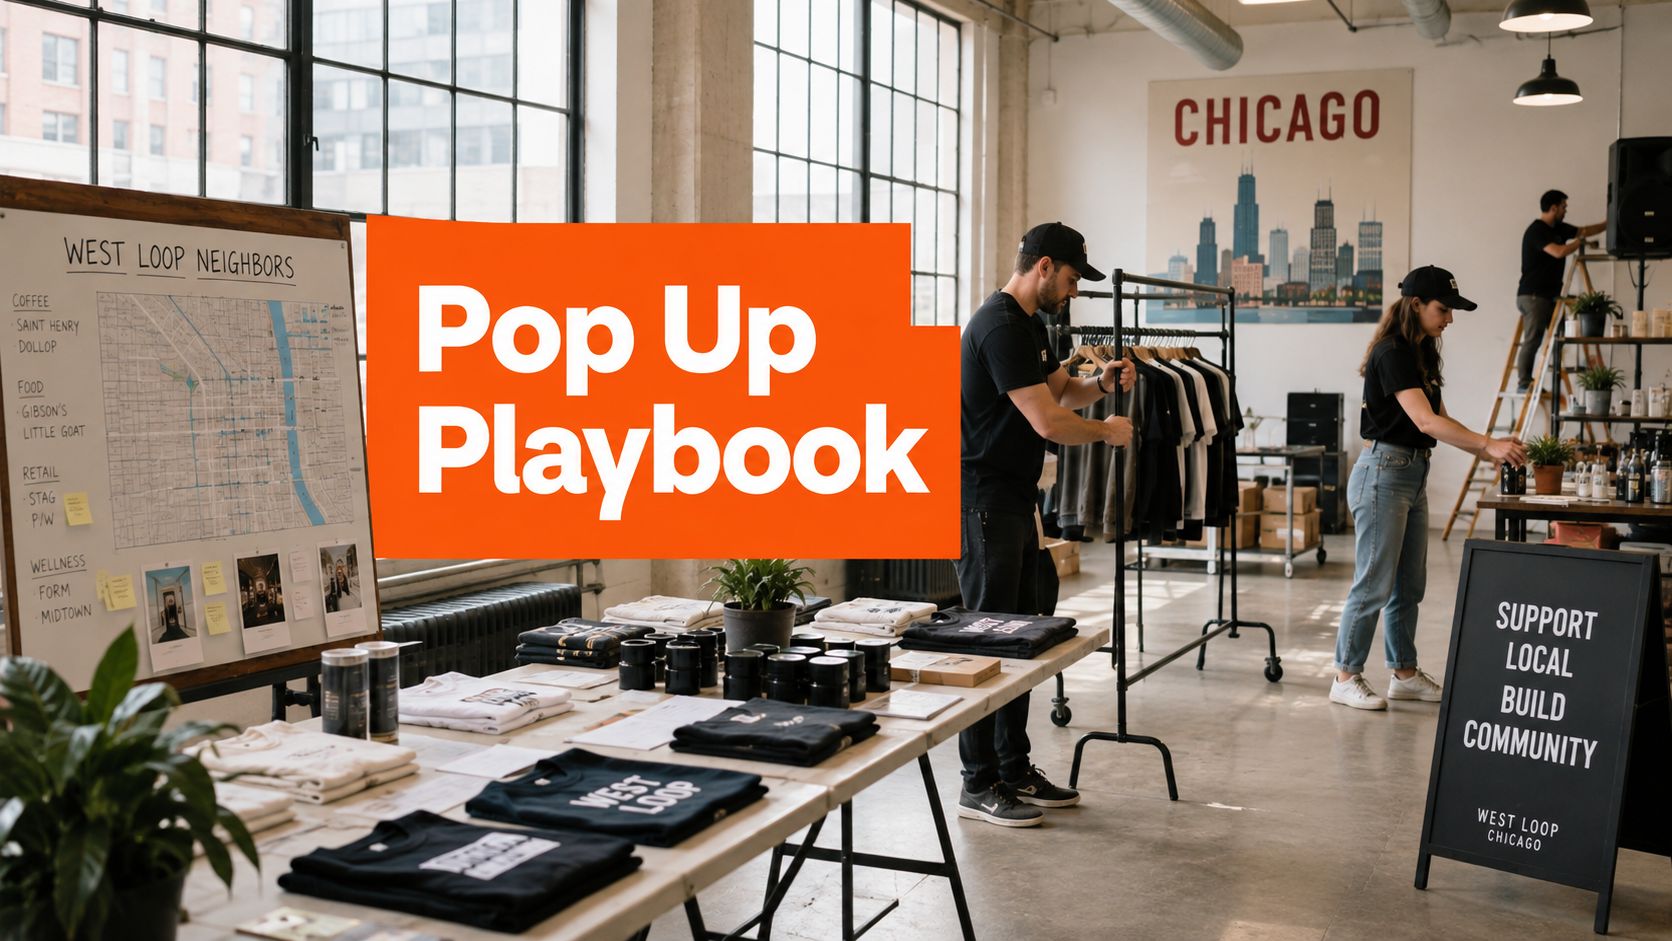
You've booked the venue, ordered samples, and announced the date. Then a vendor asks who handles the permit. Your payment reader won't connect to the Wi-Fi. The landlord mentions a load-in restriction you never saw in the contract. By opening time, the display looks fine from ten feet away, but nobody knows where to queue, browse, pay, or leave an email.
That's how pop-ups go sideways. The public sees a temporary shop or experience. You manage a small production with retail, logistics, staffing, compliance, and sales packed into a short window. I've learned in Chicago that a good idea won't rescue weak operations. You need a plan that treats the event like a live business system, not a decorated room.
Defining Your Goals Before You Spend a Dime
You're staring at an empty calendar and thinking, “We need a pop-up.” Stop there. A pop-up is a format, not a business goal.
Start by writing one sentence that completes this phrase: “This event succeeds when…” Choose one primary outcome. You might want direct product sales, qualified email signups, partnership conversations, customer feedback, or a stronger local community. You can track several supporting outcomes, but one must lead. If you ask the event to build awareness, sell inventory, collect leads, host partners, and create content at the same time, your team will make poor trade-offs all day.
A sales activation needs a different setup from a brand experience. A sales event needs visible pricing, enough inventory, fast checkout, and staff who can explain the purchase. A community event may prioritize conversation, introductions, and permission-based follow-up. Both can work. They shouldn't share the same scorecard.
Write the scorecard first
Use a one-page worksheet before you call a venue:
- Primary outcome: Choose one result that decides whether you repeat the event.
- Supporting outcomes: Add the smaller results that help explain performance.
- Audience: Describe who you want in the room, including neighborhood, need, and buying context.
- Offer: Decide what people can buy, book, join, or request.
- Tracking method: Assign a tool to each result, such as Shopify POS for sales, Mailchimp for email capture, and a simple partner form for introductions.
- Decision rule: Write what you'll do after the event if the primary result is weak, acceptable, or strong.
Keep vanity measures in their place. Foot traffic, photos, and social mentions can tell you whether people noticed the event. They can't tell you whether the right people bought, joined your list, booked a consultation, or returned later.
Practical rule: If a metric doesn't change a decision, it's decoration.
Set a baseline before opening. Record recent average order value, normal email growth, sales from the product line, and the time your team spends handling a customer. Then compare the pop-up against those normal conditions. That gives you a cleaner read than celebrating a busy room with weak commercial results.
The format has matured from novelty into a repeatable channel. Modern pop-up retail is widely traced to a 1997 Los Angeles event often called the “ultimate hipster mall,” while the term gained broader traction in the early 2000s; the 2003 Song Airlines pop-up shop in New York City and Samsung's SoHo pop-up in 2013 sit along that history, as documented in the history of pop-up retail. Your job is to decide what role the channel plays for your brand before you spend money making it look exciting.
Building a Realistic Budget and Timeline
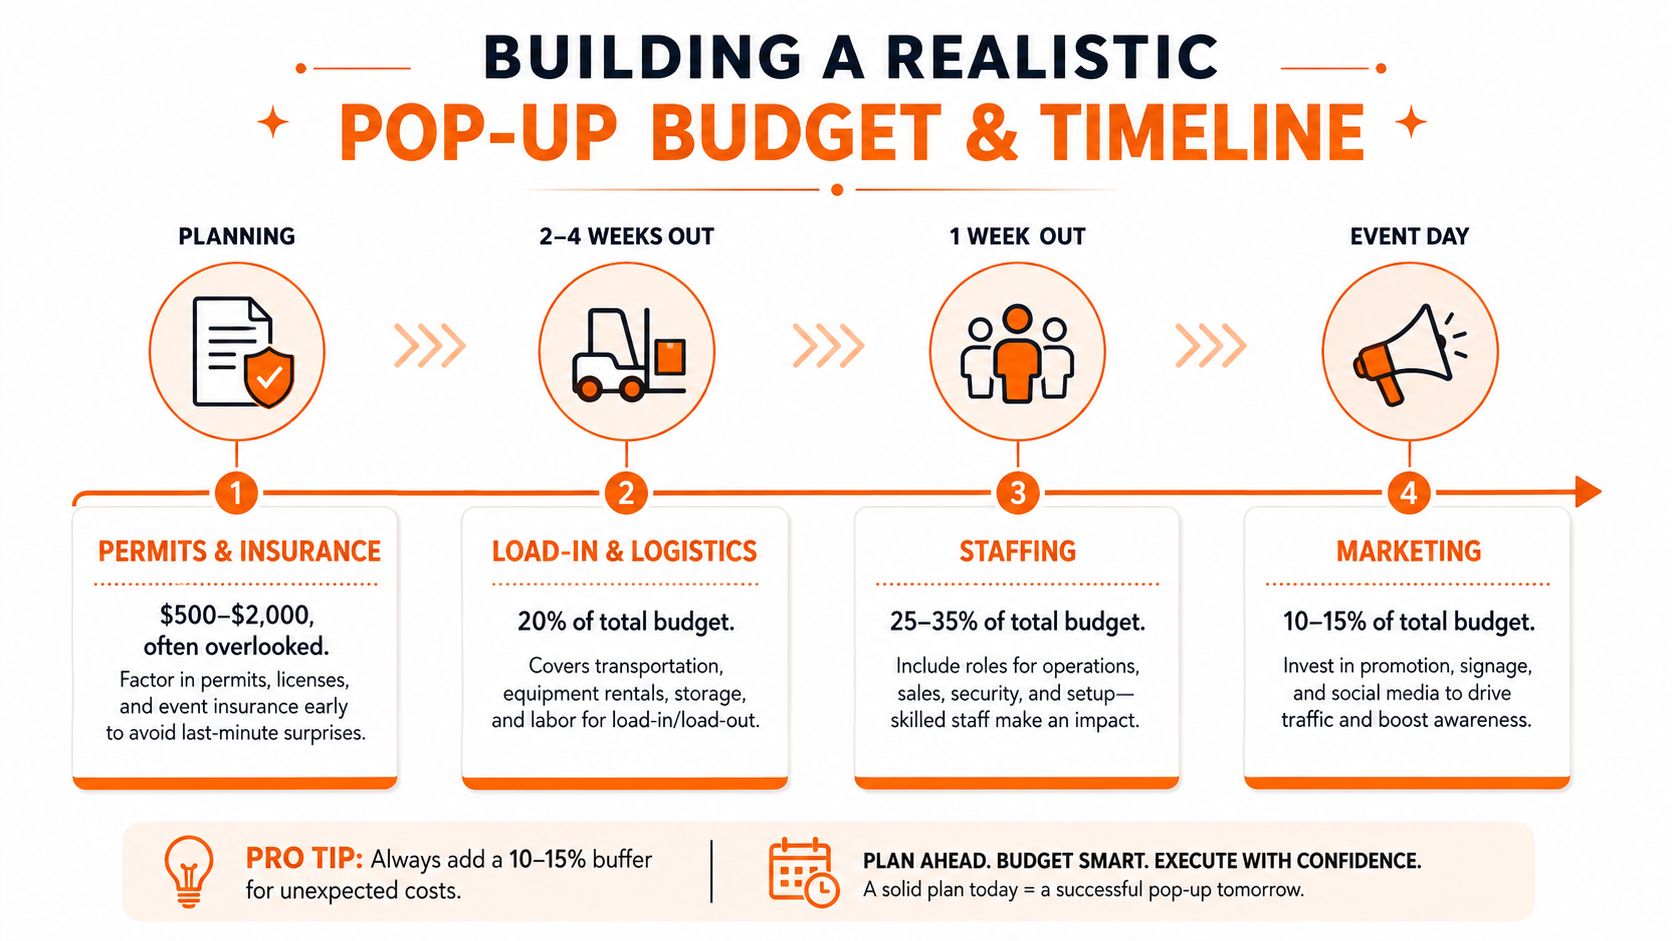
Pop-up budgets rarely break because of one dramatic expense. They break through small omissions. You forget insurance, permit work, delivery windows, extra labor, payment hardware, storage, cleaning, or a replacement extension cord. The invoice arrives after you've already committed the marketing budget.
The commercial case is real, but that doesn't make every activation profitable. A 2026 industry analysis estimates temporary retail spaces generate about $80 billion annually and projects more than $95 billion in 2026. It also estimates U.S. temporary retail and pop-up revenue at $15.6 billion in 2025 across 42,500 businesses. You can review those figures in Capital One Shopping's pop-up retail statistics. The same analysis reports that 44% of pop-up shops cost less than $5,000 to open, and cites studies suggesting a pop-up can lift sales revenue by 35%. Treat those figures as market context, not a promise for your event.
Put every cost in a visible bucket
Build your working budget around these categories:
- Space: Rent, deposit, cleaning, furniture, and any venue service charges.
- Compliance: Permits, insurance, inspections, food approvals, and alcohol requirements.
- Production: Tables, lighting, displays, signage, electrical needs, Wi-Fi, and payment equipment.
- Labor: Setup, selling, registration, security, photography, and teardown.
- Inventory: Product, packaging, samples, bags, and replacement stock.
- Promotion: Design, printing, partnerships, email, content, and paid media.
- Contingency: Money reserved for problems you can't predict.
A budget under $5,000 can support a focused activation, especially when you use an existing venue, limit the product range, keep the display modular, and use your own team. It won't comfortably support a custom build, extensive entertainment, multiple contractors, and a large inventory commitment. Spend more when the event has a clear revenue path or strategic purpose, not because an empty venue makes every idea look bigger.
Work backward from the doors
Set the event date, then work backward from four anchors: contract completion, vendor confirmation, marketing launch, and setup. Give permits and insurance their own line instead of hiding them under “admin.” If your team manages creative production with many moving parts, a structured planning DTF workflows approach can help you assign owners, files, approvals, and deadlines without relying on memory.
Your final budget should answer one uncomfortable question: How many sales, leads, or qualified conversations do we need to justify the spend? If you can't answer that, you're planning a party and hoping it becomes a business.
Choosing the Right Location and Navigating Permits
A busy block can still produce the wrong audience. A quiet partner venue can outperform it if visitors already understand the product and have time to talk. In Chicago, I'd compare Wicker Park, Logan Square, and the Loop by audience fit, access, operating restrictions, and the behavior you need, not by reputation alone.
Wicker Park can suit a product that depends on browsing, visual discovery, and nearby retail behavior. Logan Square can make sense for community-led formats and partnerships where people stay longer. The Loop can work for a weekday audience tied to offices, institutions, or planned visits. Those are starting hypotheses. Walk the area at the same day and time you plan to operate, then check whether people can see the entrance, stop without blocking traffic, and carry what they buy.
Run the location through four tests
- Audience fit: Can your intended customer reach the site easily, and does the surrounding activity match the offer?
- Physical fit: Can the venue hold your display, checkout, queue, storage, staff, and accessible paths?
- Operating fit: Can you load in, power equipment, play approved sound, serve food, and leave on time?
- Contract fit: Does the agreement state who carries insurance, obtains permits, handles damage, manages waste, and controls vendor access?
Compliance needs its own decision tree. Confirm the venue's occupancy rules, fire requirements, noise limits, alcohol permissions, food approvals, signage restrictions, and street or park rules before you buy materials. For temporary or repeat events, ask the authority how the rules change across dates. Ireland has extended the required consultation window for event licensing to 36 months before the event in certain cases, according to the Irish event licensing regulation. That example should change how early you ask questions, even if your Chicago process differs.
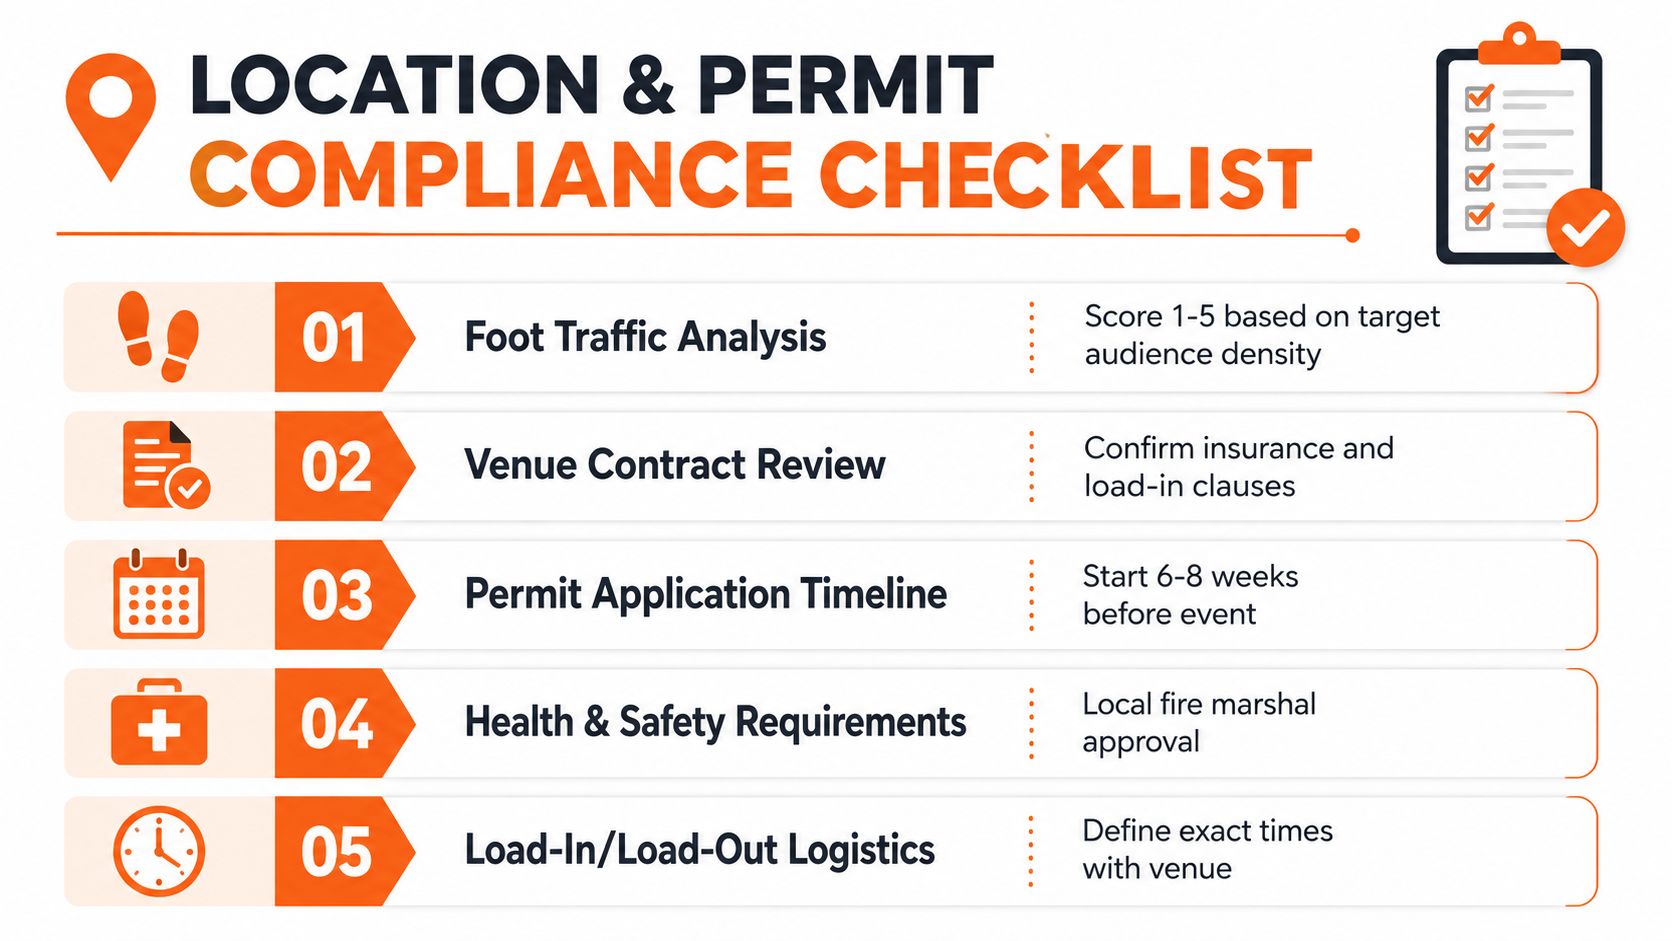
Food rules catch founders because “free” doesn't mean exempt. In Salt Lake County, public food service requires a health department permit even when the food is free, each vendor needs its own temporary food permit, and the person in charge must submit the application at least one week before the event. Nonprofits don't receive a fee exemption, as stated in Salt Lake County's temporary food permit guidance. New York City asks organizers to verify every food vendor's permit and requests notice 30 days before the event, plus a vendor list and, for private property, a signed owner contract, according to New York City's temporary food service rules. Orange County, California also requires a Temporary Food Facility permit when vendors sell or give away food, including free samples, as explained by Orange County's food facility guidance.
For Chicago planning, keep a permit folder with the venue contract, insurance certificate, floor plan, vendor records, food documents, alcohol documents, and written approvals. The City of Chicago small business resources can help you find local starting points, but confirm requirements with the relevant city department and venue before you file.
Coordinating Vendors and Designing Your Display
At one Chicago activation, the brand had a strong product and a clean booth. Customers still walked past. The table sat across the entrance, the bestseller hid behind a sign, and the payment line cut through the browsing path. People had to work to understand where to start.
At another event, the team built the space in a simple order. They placed the table and checkout first, added vertical levels, put the strongest products where customers naturally looked, then installed signs that answered price and product questions. Before opening, one person walked the space from the customer's view. That small inspection caught a blocked product, a loose cable, and a sign facing the wrong direction.
Build the booth in sequence
Arrive early enough to fix the layout, not merely unpack it. Vendor guidance recommends arriving 60 to 90 minutes before opening and using a stepwise build sequence, starting with the anchor space, adding levels, placing bestsellers in prime positions, adding signage, and completing a customer-view walk-through. The pop up shop display stands guide from Display Guru can help you compare display types before you commit to a setup.
Give every vendor a written load-in sheet. Include the arrival window, entrance, parking instructions, booth dimensions, power location, table rules, signage limits, contact person, and teardown requirement. Ask vendors to confirm in writing. A verbal “we'll figure it out” becomes your problem when the truck arrives.
Use one owner for each operating area:
- Display lead: Owns layout, stock presentation, signs, and restocking.
- Vendor lead: Manages arrivals, missing equipment, and venue communication.
- Sales lead: Runs checkout, payment troubleshooting, refunds, and transaction records.
- Guest lead: Greets visitors, explains the flow, collects consented contact details, and manages the queue.
- Runner: Handles supplies, water, bags, cables, and urgent fixes.
Don't guess staffing from floor size alone. Assign people to customer volume, checkout complexity, service time, and restocking needs. If one person greets, explains products, processes payment, and fetches inventory, the first rush will expose the gap.
A short vendor relationship management guide can help you formalize confirmations and ownership. Your display should behave like a store aisle, not a storage table. Customers need a clear entry, an obvious first product, room to browse, and a checkout point that doesn't interrupt everyone else.
Marketing Your Pop-Up to the Right People
Paid ads can fill a calendar with impressions while your event stays empty. Small brands usually get better control by starting with people and places that already have a reason to care.
Build a partner list around customer overlap. A coffee shop can introduce a food brand to regulars. A boutique can pair with accessories. A gym, salon, studio, or neighborhood organization can bring an audience with a relevant need. Give each partner a simple package: a short description, date, location, offer, image, tracking link, and two ready-to-post messages. Make the exchange clear. You promote their event, provide samples, create content, or share a portion of sales where appropriate.
Use Chicago networks with discipline
Reach out to neighborhood Facebook groups, local event calendars, business associations, and community newsletters. Follow each group's rules. A useful post explains why the event benefits members and gives practical information. “Come support us” is weaker than a clear invitation built around a product demo, limited appointment slots, local collaboration, or useful workshop.
Local creators can help when they live near your target audience or speak to the customer you want. Don't buy a large audience you can't verify. Ask what portion of their followers lives near the venue, what content they normally publish, and how they'll disclose the partnership.
Your existing email list deserves priority. These people already gave you attention, so send a sequence with the reason to attend, the practical details, a reminder, and a follow-up. Give subscribers an event-only reason to act, but don't train them to wait for deep discounts.
For visual work, branding help from Creative Graphic Solutions can give you a useful reference for translating your identity into signs, packaging, and the booth itself. Keep the creative system consistent. A customer should recognize your table from across the room and understand the offer after a quick glance.
Track each source with a separate QR code, signup form, or checkout tag. Then you can compare partner traffic, email responses, creator referrals, and community posts by actual conversations, signups, and purchases. Likes are feedback. They're not the outcome.
Running a Smooth Event Day
Event day should feel boring to the organizer. That means you solved the questions before customers arrived.
Build the run sheet backward from four hard anchors: access time, guest arrival, last call or program cutoff, and vacate time. Place every vendor arrival, crew movement, break, restock, sound check, and buffer around those anchors. The run sheet should name one owner for every task and include a phone number, location, and completion check.
Use the four-anchor run sheet
- Access time: Enter the site, inspect the room, receive vendors, confirm power, and mark the floor plan.
- Guest arrival: Finish the staff briefing, test payment and scanning, check music and lighting, stock the display, and open the queue.
- Last call or program cutoff: Stop new service or sales at the stated time, explain the closing process, and protect the final customer experience.
- Vacate time: Pack inventory, remove waste, photograph the empty space, return keys, and get venue sign-off.
The pre-open checklist should cover power, Wi-Fi, signage, scan tests, staff briefing, vendor confirmations, payment devices, bags, receipt supplies, cleaning materials, and emergency contacts. The pop-up party planning benchmark supports building the schedule around these four anchors and checking operational details before doors open.
Run a short huddle before guests arrive. Explain the primary goal, the offer, the customer path, the escalation plan, and who can approve a discount or service recovery. Give staff a sentence they can use to greet people without trapping them in a sales pitch.
Late vendor? Open with the approved fallback display and document the missed arrival. Payment failure? Move to a backup device or manual capture process that protects customer information. Unexpected crowd? Assign one person to the queue, pause demonstrations, and keep exits clear. Don't let a surprise turn into a group debate. The lead makes the call, the team executes, and you record the issue for the next event.
Measuring Success and Converting Attendees
A crowded room can hide a weak event. Measure what happens after attention turns into a transaction, signup, booking, or useful conversation.
Set up tracking before the first guest arrives. Use separate QR codes for partners, email, signage, and creator referrals. Tag sales in Shopify POS or your payment system. Give staff a simple form for partnership leads and customer questions. Ask for permission before adding anyone to email or text marketing, and collect only information you'll use.
Your operating dashboard should connect four questions:
- Did the right people attend? Compare source, audience fit, and conversations.
- Did they act? Track purchases, bookings, signups, samples requested, and qualified leads.
- Did the event make economic sense? Compare contribution from the event against event costs, including labor and inventory.
- Did people return? Watch repeat purchases, replies, bookings, referrals, and community participation after follow-up.
A useful break-even model is simple:
Event contribution = event revenue and attributable future value, minus total event cost.
Use your own baseline for assumptions. Don't copy generic conversion targets from an infographic or another brand. Your results depend on product price, buying cycle, audience intent, inventory, staff skill, and the length of the activation. An event that loses direct sales can still earn another chance if it produces qualified leads at a reasonable cost and your follow-up turns those leads into customers.
Make follow-up part of the event
Send a thank-you message while the experience remains fresh. Segment buyers, non-buying signups, partners, and people who requested information. Buyers need product care or reorder guidance. Non-buyers need the answer to the question that stopped them. Partners need a clear recap and a next idea.
Use a QR code that leads to a focused signup page or digital contact card. This free QR code and contact card guide can help you create a practical handoff instead of printing a card people lose.
Review the event with your team while details remain clear. Keep, change, stop. If you can't connect the activation to sales, qualified demand, retained contacts, or a defined learning decision, don't repeat the same format. Change the offer, audience, location, or operating model before you spend again.
Chicago Brandstarters gives founders a free, vetted community for practical conversations, small private dinner events every two weeks, and honest support while you build. If you're planning a pop-up and want operator feedback on the offer, partnerships, or follow-up plan, visit Chicago Brandstarters and see whether the community fits how you work.
Leave a Reply