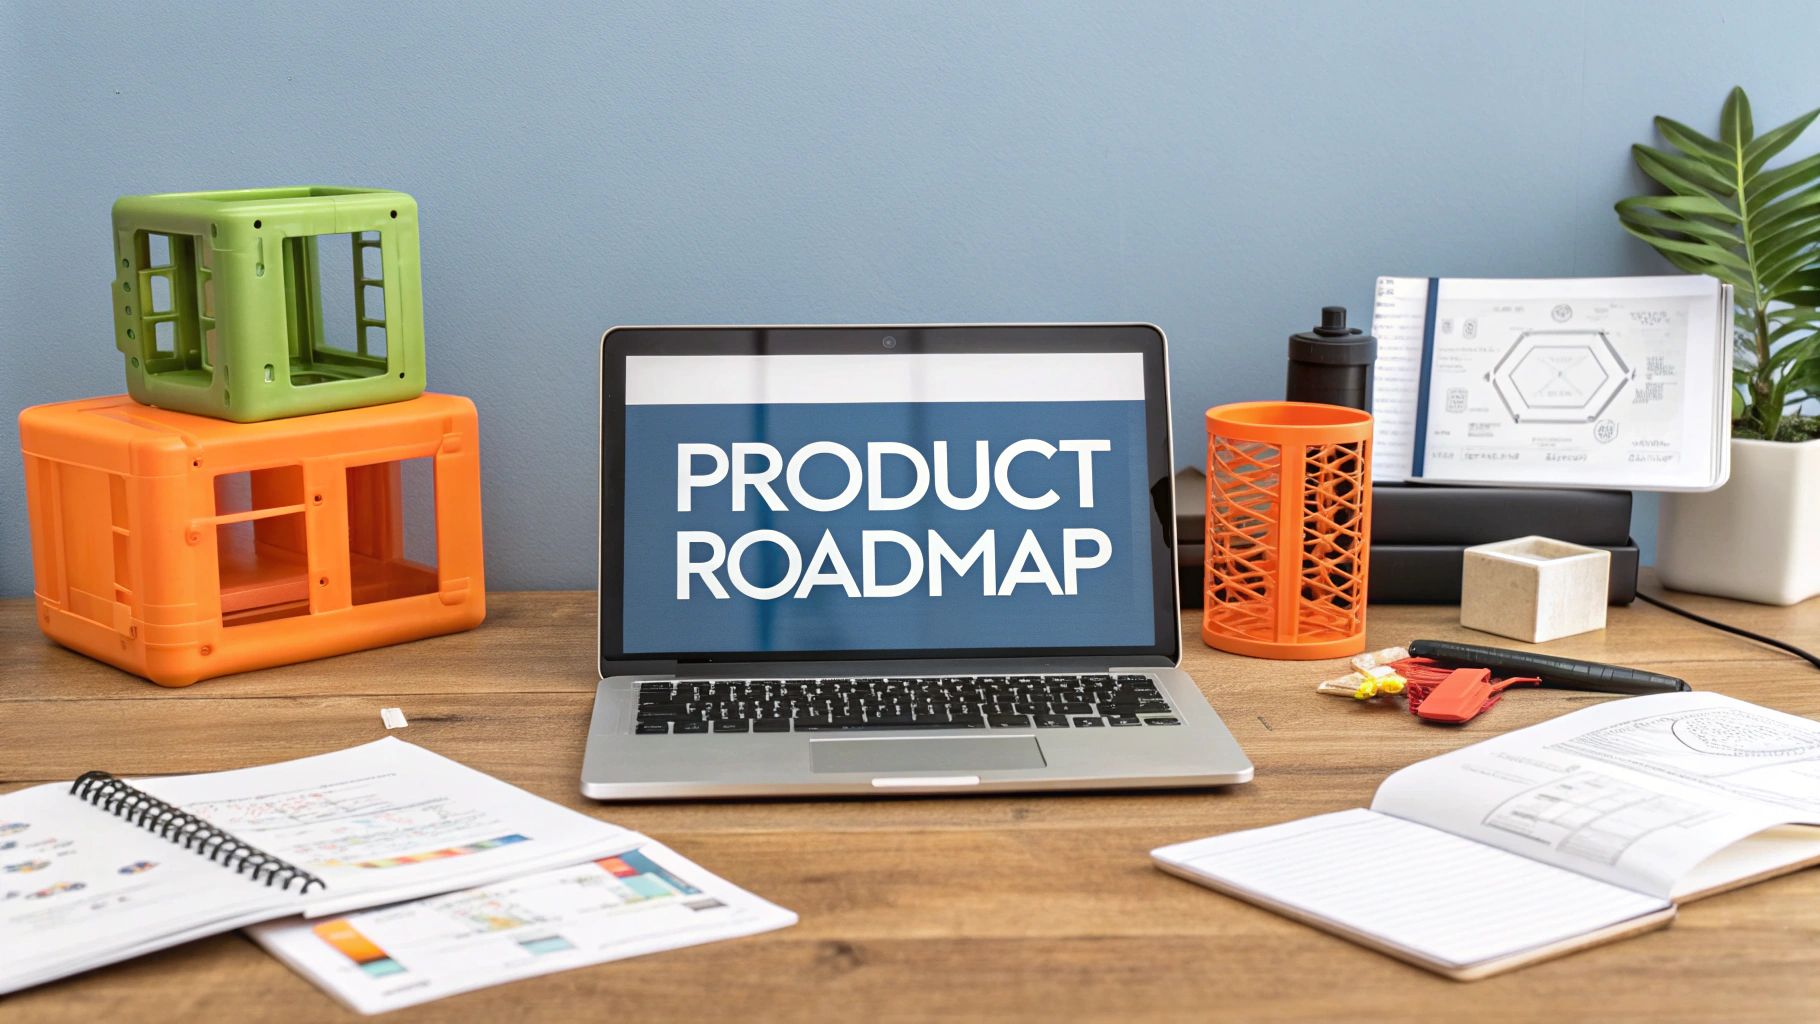
Bringing a new product to life is an incredible journey. But the smartest first move you can make is prototyping your product design.
Think of it as the cheapest, fastest insurance policy for your big idea. Prototyping makes your concept real, fast, so you can learn what works before sinking serious time and money into it.
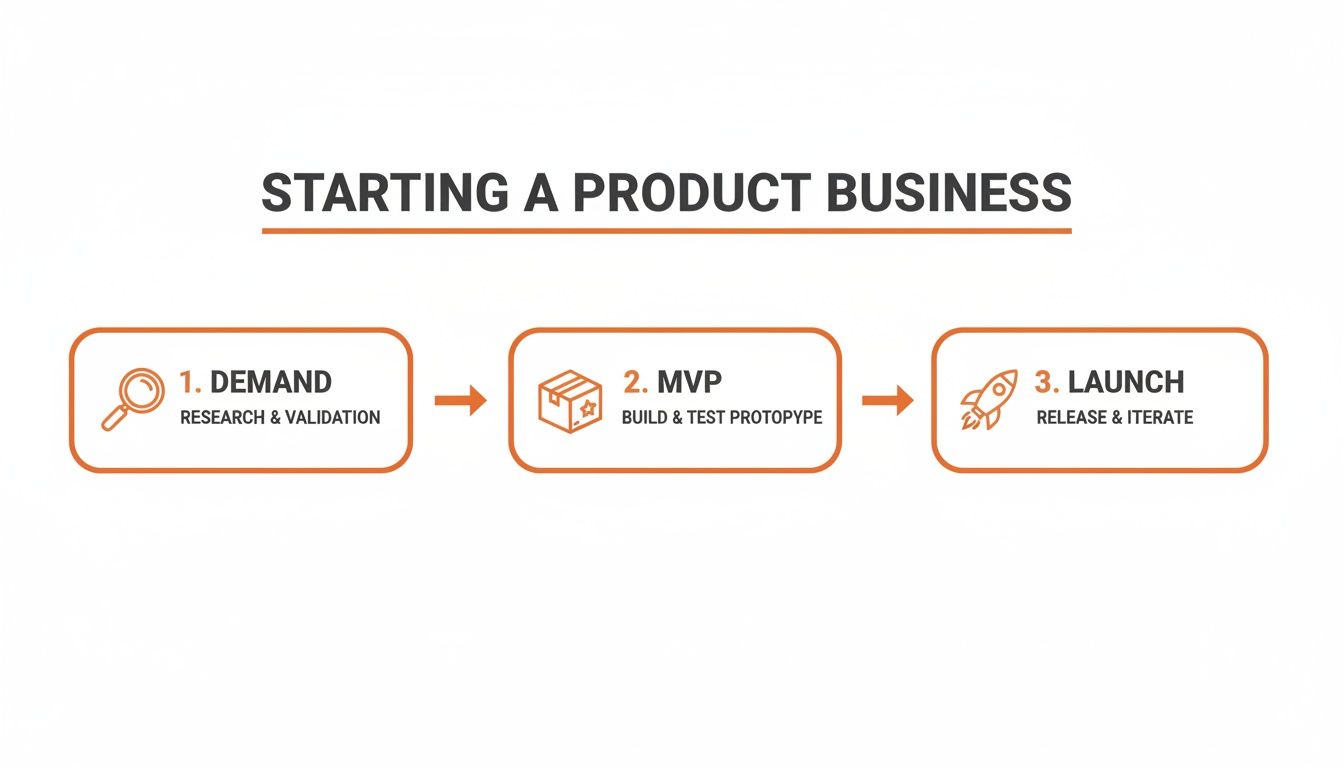
Why Prototyping Is Your Smartest First Move
Would you build a house without a blueprint? Of course not. A prototype is your product’s blueprint. It’s a scale model and a test drive all in one. The goal isn't perfection; it’s learning.
Instead of chasing a flawless final version, just make a physical version of your idea. A sketch on a napkin or a cardboard model works great. This lets you fail small so you can win big.
The Power of Tangible Ideas
An idea in your head is perfect. The moment you build it, you find the holes.
Prototyping forces this reality check to happen early, saving you from expensive surprises later. It helps answer critical questions:
- Do people understand how to use this?
- How does it feel? Is it awkward or intuitive?
- Does it really solve the problem you think it does?
The data backs this up. Companies using prototypes are 62% more likely to succeed. It's no surprise that 85% of product managers call them essential. The best teams run an average of 6.2 major product projects a year, proving that fast, cheap iteration drives results. You can dig into more product development statistics that highlight these trends.
Your first idea is rarely your best one. Prototyping gives you permission to explore, test, and toss ideas without ego. It makes room for the one that will actually connect with customers.
This is where 'fidelity' comes in—how realistic your prototype is. Starting with low-fidelity models is the wisest path. It keeps costs near zero, speeds up learning, and keeps you focused on the core function, not flashy details.
Matching Prototype Fidelity to Your Goals
In product design, fidelity is just a fancy word for how realistic your prototype is. Think of it like giving directions. A quick napkin sketch is perfect for showing a friend the coffee shop around the corner. But to navigate a new city, you need a detailed satellite map.
Using the wrong map gets you lost and wastes time. It's the same with prototypes. Knowing what level of detail you need—and when—is a critical call.
Low-Fidelity: Exploring the Big Idea
Low-fidelity (lo-fi) prototypes are your napkin sketches. They are quick, dirty, and cheap. They are designed to be thrown away. Their only job is to get the idea out of your head and into a form someone else can react to.
This is where you ask the big questions. Does this concept make sense? Does it solve a real problem? Forget colors or fancy materials. We're talking pen and paper, cardboard, or basic digital shapes.
A lo-fi prototype's job isn't to wow anyone. It's to learn as much as possible, as fast as possible, for as little money as possible. A huge trap for founders is falling in love with a beautiful design too early. It makes you defensive to tough feedback that could save your business.
Mid-Fidelity: Testing the User Journey
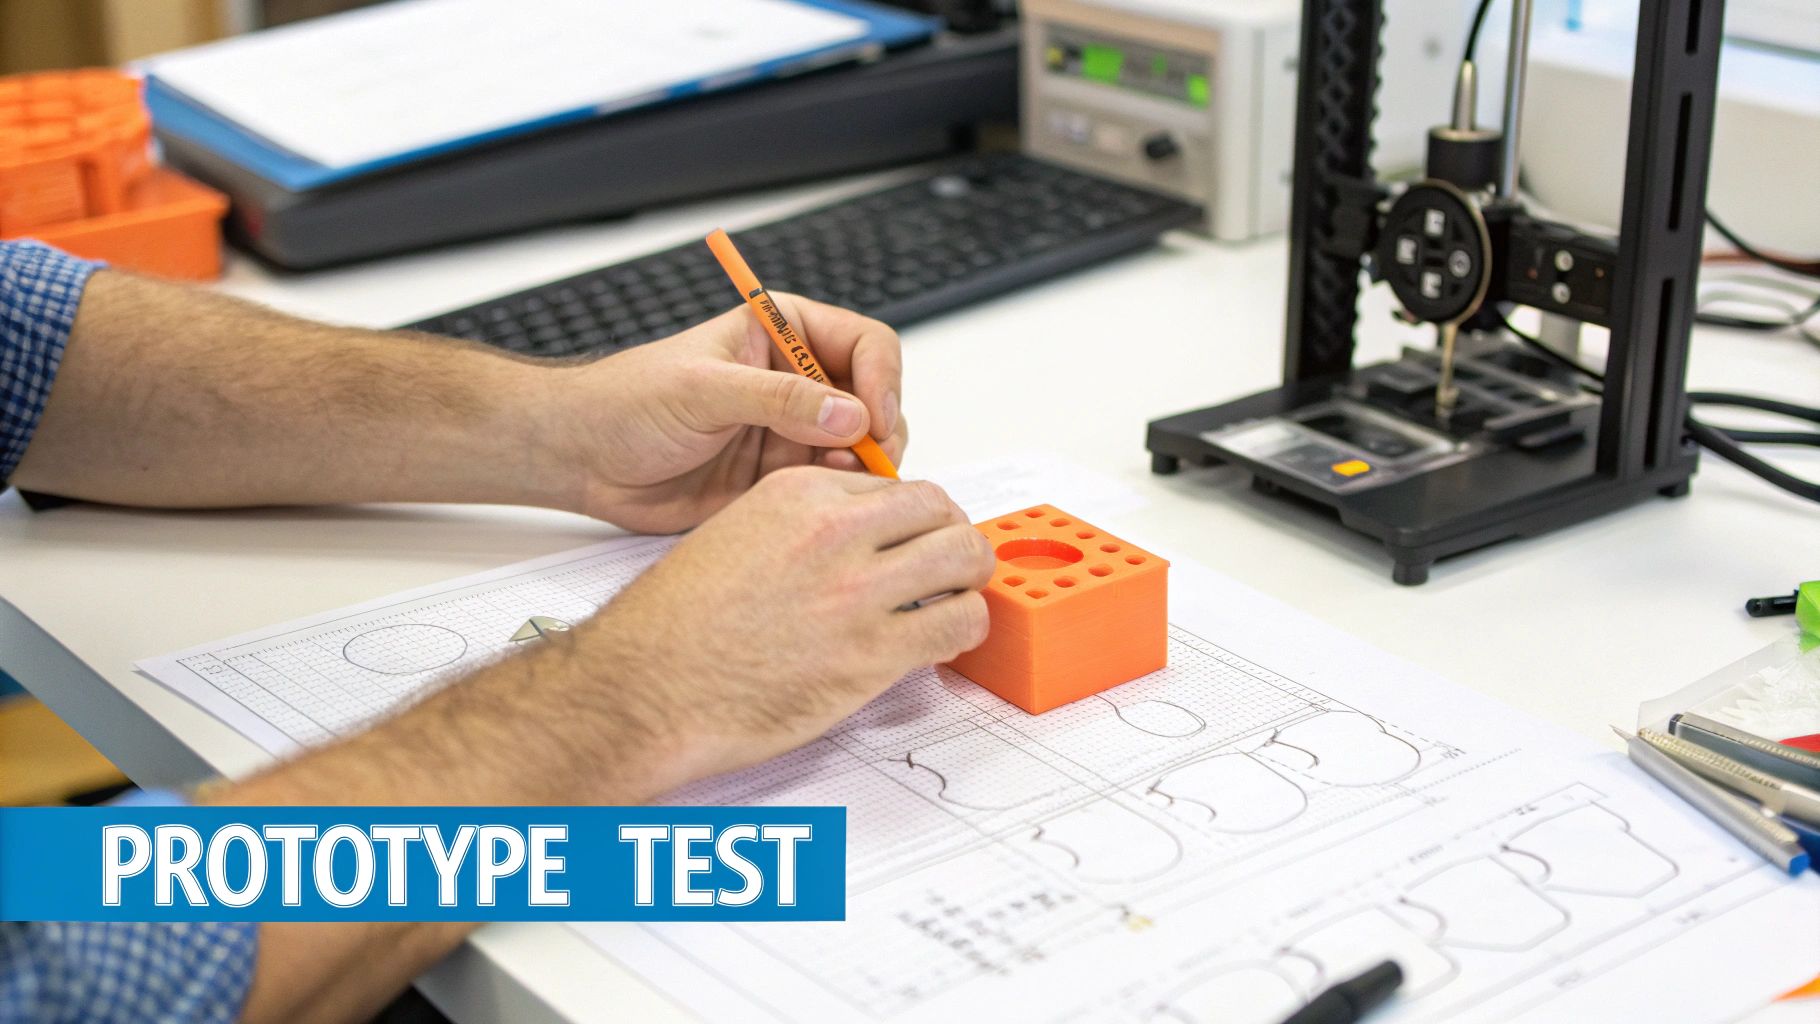
Okay, your core concept feels right. People get it. Now it's time to add a bit more structure. Mid-fidelity (mid-fi) prototypes are like a basic digital map—they show the main roads and how they connect. Here, you focus on the user flow and basic ergonomics.
For a physical product, this might be a rough 3D print to see how it feels in a hand. For an app, it's a wireframe that lets users click through the main screens to complete a task. You're testing the journey, not the destination's decor. The focus is on function, layout, and flow.
This is the perfect point to build a simple Minimum Viable Product (MVP). To see a real-world example, check out this guide on a product MVP example and learn how a stripped-down version can prove your key assumptions.
High-Fidelity: Validating Before Production
High-fidelity (hi-fi) prototypes are your turn-by-turn satellite maps. They should look, feel, and function as close to the final product as possible. For a digital product, that means an interactive mockup with real branding and a polished interface. For a physical product, it’s a fully functional model made with production-grade materials.
This is your final check—your last chance to catch deal-breaking flaws before you sink serious cash into manufacturing or code. You're no longer asking, "Is this a good idea?" You're asking, "Is this specific design the right one to build?"
For example, this screen from Figma shows what’s possible. It's the industry standard for creating hi-fi digital prototypes.
Designers can build clickable mockups that feel so real, you'd swear it was the final app. This lets you run user tests on everything from button placement to the overall vibe before a single line of code is written. Think of it as the final dress rehearsal before opening night.
Prototype Fidelity Guide: What to Use and When
Feeling overwhelmed? Don't be. The right choice is clear once you know your goal. This quick table helps match your objective with the right tools.
| Fidelity Level | Primary Goal | Common Tools & Materials | Best For |
|---|---|---|---|
| Low-Fidelity | Explore concepts quickly and cheaply. Get initial gut reactions. | Pen & paper, sticky notes, cardboard, Balsamiq, Whimsical | Early brainstorming, validating the core problem, testing basic ideas with your team. |
| Mid-Fidelity | Test user flow and functionality. Figure out layout and interactions. | Figma (basic wireframes), Sketch, 3D printed models | Building an MVP, testing the sequence of steps in a user journey, getting feedback on usability. |
| High-Fidelity | Validate the final design before production. Test visual appeal. | Figma (interactive mockups), Adobe XD, production-grade materials, CNC machining | Final user testing before launch, securing investor buy-in, handoff to developers or manufacturers. |
This isn't a rigid, step-by-step process. It's a loop. You might make a lo-fi prototype, get feedback, and jump straight to a hi-fi detail to test one specific interaction. The key is to always ask: "What's the biggest question I need to answer right now?" Then, build the cheapest, fastest thing to get that answer.
How Prototyping Protects Your Time and Money
As a founder, you fight for two things: time and money. Every move either buys you more runway or brings the end closer. Prototyping isn't just a design task; it guards both of your most precious resources.
This is about the painful cost of finding flaws when they’re expensive to fix. Imagine tweaking a 3D model in your software—that's a five-minute job. Now imagine making that same change to a finished steel injection mold. That’s not a tweak. That's a potential five-figure catastrophe.
The Soaring Cost of Late Changes
The cost to fix a mistake explodes the closer you get to production. A $50 cardboard model that reveals an ergonomic flaw saves you from a $50,000 tooling disaster. You are trading pennies today to save thousands tomorrow.
This small upfront investment de-risks your entire venture. It's not just a budget item; it's a strategic investment. It buys certainty, stretches your runway, and gets you to market much faster.
This decision tree shows how to match your goal—exploring ideas, testing interactions, or getting final sign-off—with the right prototype level.
It’s clear that starting with cheap, low-fidelity prototypes for initial exploration is the smartest path before you commit real resources.
Prototyping as a Financial Strategy
The numbers back this up. Early validation can slash product development costs by 30% and cut time-to-market by up to 50%.
For small teams, preventing even one late-stage tooling change has a massive positive ripple effect. You can read more about the financial impact of prototyping and how it gets products to market faster.
When you build a prototype, you're not just making a thing. You're buying information. And the information from a cheap, early prototype is the most valuable data you can get.
Prototyping shifts learning to the beginning, where changes are easy and cheap. You test your core assumptions with real people and gather hard data before you place that huge, non-refundable factory order. This is not just good design practice; it's smart business.
Getting Real Feedback with Rapid User Tests
A prototype is only as good as the feedback it creates. But ‘user testing’ sounds intimidating and expensive. It doesn’t have to be.
Think of it as a curious conversation, not a scientific study. Your goal isn't a "yes" or "no" on your design. It's to watch someone use your idea and see where their assumptions clash with your vision. This is where you find deal-breaking flaws while they're still cheap to fix.
Finding Your First Testers
You don't need a huge, professional focus group. You can find 85% of major usability problems just by testing with five people. Finding them is easier than you think.
Start with your network, but with a twist. Don't ask your mom or best friend—they love you and will likely say what you want to hear. Instead, ask them who they know that fits your target audience. That one degree of separation makes a world of difference for honest feedback.
Here are a few ways to find your first 5-7 people:
- Social Media Groups: Join relevant communities on LinkedIn, Facebook, or Reddit. Post an honest request for feedback on a new product concept.
- Local Meetups: Find events related to your product's niche. Strike up conversations and ask if people will share their thoughts for 15 minutes. Coffee's on you.
- The "Help Me Out" Email: Send a personal email to a few friends. Don't ask for their feedback; ask for an introduction to one person they think would be a great fit.
This process is a key part of early-stage development. We have an in-depth guide that shows you exactly how to validate a business idea with these kinds of real-world conversations.
Running a Feedback Session That Works
The secret to a great feedback session is to make it feel natural, not like an exam. Your job is to listen and observe, not to sell or defend.
Just hand them the prototype and give them a simple task. Something like, "Imagine you're trying to find a gift for a friend. Show me how you'd use this." Then, the most important part: be quiet and watch.
Your goal is observation, not persuasion. The moment you start explaining how something is supposed to work, you've lost the chance to see where your design fails on its own.
Ask open-ended questions that encourage them to think out loud. Your best friend is the phrase, "Walk me through what you're thinking right now."
What to Ask (and What to Avoid)
| Good Questions (Open-Ended) | Bad Questions (Leading & Closed) |
|---|---|
| "What are you seeing on this screen?" | "Do you like the color of that button?" |
| "What do you expect to happen when you click that?" | "Was that feature easy to use?" |
| "Tell me about a time you tried to…" | "Wouldn't it be better if this did…?" |
| "Where would you go from here?" | "Is this design better than our competitor's?" |
This approach to prototyping product design turns feedback from a scary judgment into a team effort. You're not asking them to rate your work; you're inviting them to help you solve a puzzle. The insights you'll get are pure gold.
Alright, you’ve put your prototype in front of real people. Now what? You have a pile of notes, comments, and observations. This is where the magic happens.
Great products aren't born fully formed. They are sculpted, piece by piece, through this exact cycle: build, test, learn, repeat. That feedback is the chisel in your hand.
Right now, it all feels like a mess. Your first job is to bring order to the chaos. Think of it like sorting LEGOs—you group similar pieces together before you can build something new. Your goal is to spot the patterns.
Sorting Feedback into Actionable Themes
Not all feedback is created equal. A comment about a button color is less important than someone getting stuck on the main task. Organizing everything helps you see the big picture.
As you go through your notes, you'll see a few buckets form. I find it helpful to group things into three categories:
- Critical Usability Problems: These are "house is on fire" issues. If someone couldn't figure out the core function or got so lost they wanted to give up, that's a top priority.
- Points of Confusion: These are smaller hurdles. Maybe a user hesitated, or misinterpreted an icon. It wasn't a dealbreaker, but it was a moment of friction you need to smooth out.
- 'Nice-to-Have' Ideas: This is where feature requests live. This stuff is gold, but it’s about making the product better, not fixing something that's broken.
This process turns a messy pile of notes into a clean, organized list. Now you can decide what to tackle first.
Prioritizing What Matters Most
You can’t fix everything at once. If you try, you’ll just spin your wheels. The name of the game is ruthless prioritization.
A simple—but very effective—way to do this is with an impact vs. effort matrix.
Your first idea is rarely your best one, and that's okay. Handling tough feedback with genuine curiosity instead of defensiveness is a superpower. It shows the process is working.
For every theme you found, ask two questions:
- How much impact will fixing this have on the user's experience? (Big improvement or minor tweak?)
- How much effort will it take for us to implement this change? (10-minute fix or multi-week overhaul?)
Always go for the high-impact, low-effort changes first. These are your quick wins. They deliver huge value without wrecking your timeline.
Embracing this loop—prototype, test, learn, repeat—is what separates products people love from those that miss the mark.
From Final Prototype to Manufacturing Handoff
You did it. You tested, tweaked, and iterated. You're holding a high-fidelity prototype that people love. Big win. But before you celebrate, there's one more crucial step: the handoff to your manufacturer.
This is where your prep work either saves you a fortune or costs you one. I’ve seen small mistakes in this phase turn into shockingly expensive problems.
Think of it like giving a builder blueprints for your dream house. If the plans are vague, you can't be surprised when a wall is in the wrong place. Your job is to communicate your design with so much clarity there is zero room for interpretation.
Creating Your Manufacturing Blueprint
The key to a smooth handoff is a "tech pack," sometimes called a Bill of Materials (BOM). This isn't just a 3D file. It's a master document that details every single part of your product.
Your tech pack needs to spell out everything:
- Part Details: List every screw, casing, and circuit board with precise dimensions.
- Material Specs: What’s each part made of? Don't just say "plastic"; specify the exact grade.
- Finishes and Colors: Use universal color codes like Pantone. Describe textures clearly—matte, gloss, brushed?
- Tolerances: This is huge. Define how much a dimension can vary from your spec. This is the foundation of quality control.
This document, with your final prototype, becomes your “golden sample.” It is the physical benchmark that every single production unit will be measured against.
The goal of the handoff isn’t just to transfer files; it’s to transfer understanding. Your manufacturer should know your product’s design and quality standards as well as you do.
The good news is that growth in the prototyping product design field is making this easier. The market is projected to hit US$21.3 billion in 2025 and swell to US$44.8 billion by 2032. For you, that means more specialized and capable suppliers are entering the game. That clarity protects you and ensures the product your customers get is the one you worked so hard to create.
A Few Common Prototyping Questions
I get it. Prototyping can feel like a foreign language at first. Let's clear up a few common questions I hear from founders who are right where you are.
How Much Should I Budget for This?
There's no magic number, but a good rule of thumb is to set aside 5-10% of your total pre-launch budget for prototyping.
The goal isn’t to throw money at it. It's to spend just enough to get a clear answer to your biggest question at each stage. Always start cheap before moving to more expensive methods.
How Do I Know When My Prototype Is "Done"?
A prototype is “done” when it has answered the specific question you built it to test. It’s never about perfection. Forget perfection.
A lo-fi prototype is finished the moment it validates your core concept with a real person. A hi-fi version is done when you're confident enough to write a big check for manufacturing. The point is to gain just enough confidence to take the next, more expensive step.
Can I Prototype a Digital Product, Like an App?
Absolutely. The principles are the same, you just use different tools.
Low-fidelity digital prototypes are usually simple wireframes or clickable mockups. You can make these in tools like Figma quickly. They’re perfect for testing the user journey and flow without writing a single line of code.
This is a critical, cost-saving step. You do this before bringing in expensive engineers. It ensures the logic makes sense to real users first, saving you from a world of expensive rework later.
At Chicago Brandstarters, we believe you shouldn't have to build alone. If you’re a kind, bold founder in the Midwest looking for a real community to share war stories and get honest support, we’d love to meet you. Join our free, vetted community and build alongside peers who get it. Find your people at https://www.chicagobrandstarters.com.