Let's get one thing straight—that amazing idea rattling around in your head? It's just a thought. Nothing more. At least, not until you make it real. Prototyping a product is how you build the bridge between a dream and an actual business. I think of it as creating a rough draft to see if your assumptions hold any water.
Honestly, it's the single most important thing you can do to avoid burning through thousands of dollars building something nobody actually wants.
Why Your Idea Needs to Be More Than an Idea
I'm here to bust a huge myth: you don't need a massive budget or an engineering degree to get started. Prototyping is just about making your idea tangible.
Think of it like a movie trailer. You create a short, compelling preview to see if anyone will buy a ticket before you spend millions on the full production. For a founder like you, this is all about getting momentum, and getting it fast. You move from endless "what if" scenarios to hard, real-world data. The process itself forces you to see flaws and uncover opportunities you’d never spot on a spreadsheet.
The Real Cost of Skipping Prototypes
It might feel faster to just jump straight to the final product, but trust me, it's the most expensive mistake you can make. You risk pouring months of your life and a ton of cash into something polished, only to launch to the sound of crickets. Prototyping is your insurance policy against building the wrong thing.
By creating a simple model, you can get it into the hands of real people and just watch. Their confusion, their little moments of delight, their "aha!" exclamations—that's pure gold. It's the kind of raw, honest feedback that turns a good idea into a great product. This early validation is the bedrock of a successful business, and we have a whole guide on how to validate a business idea that dives deeper into these strategies.
Turning Assumptions into Actionable Insights
Every new business idea you have is built on a pile of assumptions. You assume people have a specific problem. You assume they'll pay for your solution. You assume your design is easy to use. Prototyping is how you systematically poke holes in those assumptions.
The goal isn't perfection; it's learning. A rough prototype that generates honest feedback is infinitely more valuable than a perfect plan that lives only in your slide deck.
This isn’t just some trendy startup advice; it’s a massive economic driver. The global market for product prototyping is projected to jump from US$21.3 billion in 2025 to a staggering US$44.8 billion by 2032. Why? Because it slashes time-to-market by nearly 50% in major industries.
For you, this means you can test, learn, and pivot quickly without burning through all your cash. It's time to stop thinking and start building.
Alright, you're fired up and ready to turn that idea into something real. But what does "prototyping a product" actually look like? Your first big decision is choosing your approach, and getting this right will save you a staggering amount of time and money down the road.
Think of it like building a house. You wouldn't just start pouring a concrete foundation without at least a simple pencil blueprint, right? That napkin sketch is your low-fidelity prototype—a quick drawing, a cardboard mockup, or a basic digital wireframe. Its only job is to test the absolute core concept and see if people even understand what you're trying to do.
Then, much later, you get to the high-fidelity prototype. This is the fully-staged model home with working lights and running water. It looks and feels almost exactly like the final product, letting you test specific details, aesthetics, and how it feels to use before you sink a fortune into manufacturing.
This decision tree gives you a simple view of how to think about your starting point.
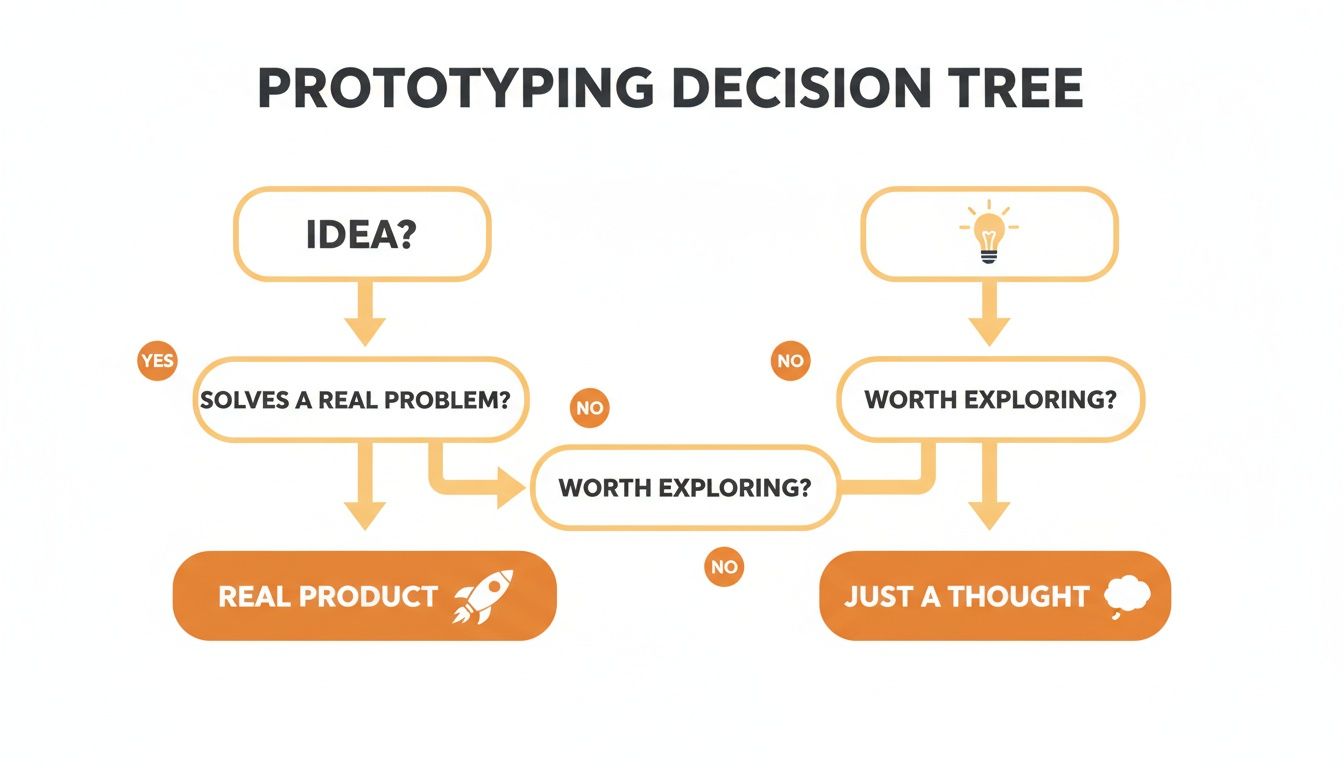
The main takeaway here? Your idea stays just an idea until you start the cycle of building something, showing it to people, and learning from what they do.
Low-Fidelity When Speed Is Everything
In the early days, low-fidelity prototypes are your absolute best friend. They're meant to be cheap, fast, and completely disposable. I once used sticky notes on a whiteboard to map out an entire app flow, and it helped our team spot a fatal flaw in our logic in under an hour. That single hour saved us weeks of coding down the wrong path.
Your goal here isn't to impress anyone. It's to get brutally honest answers to the big, scary questions:
- Do people even get what this thing is supposed to do?
- Can you figure out how to get from point A to point B without a manual?
- Is the main benefit obvious just from looking at the layout?
A simple paper sketch that reveals a fundamental user misunderstanding is 100 times more valuable than a polished 3D model that just confirms your own biases. You’re buying knowledge, not a pretty object.
High-Fidelity for Fine-Tuning and Buy-In
Once you're confident in your core concept, you'll need answers to more detailed questions. This is where you invest in a high-fidelity prototype. This could be a clickable digital mockup made in a tool like Figma or a 3D-printed model that feels just like the final version you'd hold in your hand.
These slicker prototypes are critical for getting stakeholder buy-in and testing the nuances of your user experience. You can see in our guide on a great product MVP example how a well-defined, higher-fidelity prototype sets the stage for a successful launch.
High-fidelity models help you answer questions like:
- Is the button placement actually intuitive, or just what I thought was clever?
- Does the physical weight and texture feel premium or cheap in your hand?
- Does the app interface feel snappy and responsive, or sluggish and frustrating?
Prototype Fidelity: Your Time and Money Tradeoffs
Deciding which level of fidelity to use can feel overwhelming, but it really just boils down to what question you need to answer right now. This table should help you quickly map your current need to the right tool for the job.
| Fidelity Level | What It Looks Like | Best For Answering | Typical Cost | Typical Time |
|---|---|---|---|---|
| Low-Fidelity | Paper sketches, cardboard mockups, basic wireframes (Balsamiq) | "Do people understand the core idea?" "Is the basic flow logical?" | $0 – $100 | Minutes to Hours |
| Medium-Fidelity | Clickable digital prototypes (Figma), basic 3D prints | "Is the user interface intuitive?" "Does the basic form factor work?" | $100 – $1,000 | Days to a Week |
| High-Fidelity | Looks/feels like the final product, functional components | "Does this feel premium?" "Are there any usability friction points?" | $1,000 – $10,000+ | Weeks to Months |
Ultimately, your choice always comes back to one thing: start with the cheapest, fastest method that gets you the feedback you need to take the next step. Perfection is the enemy of progress here. Your only goal is to learn.
Your Practical Prototyping Toolkit
Alright, this is where the theory ends and you actually start building something. Forget those endless textbook lists of expensive software and machinery. I’m going to share the tools and materials that I've personally seen founders use to get their ideas off the ground, focusing on being scrappy and resourceful.
You don’t need a state-of-the-art lab to start prototyping. Not even close. You just need a bit of creativity and the right direction.
Tools for Digital Product Prototypes
If you're building an app or a website, your toolkit is digital. The great news is the best tools are often free or have generous free tiers, so you can build incredibly realistic mockups without writing a single line of code.
For instance, a tool like Figma lets you design all your user interfaces and then link them together to create a clickable prototype. It's a game-changer.
This means you can visually design a mobile app, moving elements around just like you would in a graphics program. The magic happens when you connect these screens, letting a user tap through a realistic simulation of your app on their own phone.
My go-to recommendations for digital prototypes are:
- Figma: This is the industry standard for a reason. It's powerful, collaborative, and has a robust free version that’s more than enough for you to get started. You can build anything from a simple wireframe to a pixel-perfect, interactive demo.
- Balsamiq: If Figma feels too design-heavy, Balsamiq is your friend. It intentionally creates low-fidelity, sketch-like wireframes. This forces you and your testers to focus purely on layout and user flow, not colors and fonts, which is invaluable early on.
Materials for Physical Product Prototypes
For those of you building something you can actually hold, your toolkit looks a lot more like an arts and crafts drawer. Don’t laugh—foam core, hot glue, and cardboard are the secret weapons of many successful physical product founders.
This is where you can get really creative and save a ton of money. Before you even think about 3D printing, ask yourself: can I mock this up with materials from a hardware store? The answer is almost always yes.
The goal of your first physical prototype isn't to look pretty; it's to test ergonomics, size, and basic form. A block of wood carved into the shape of your device can give you more valuable feedback on how it feels in the hand than a slick 3D rendering ever could.
The market for these materials is also getting cheaper and more accessible. The rapid prototyping materials market hit USD 801.43 million in 2024 and is projected to grow significantly.
This growth, especially in Asia-Pacific, means materials are becoming easier for you to get and more affordable. You can learn more about how these market trends lower costs for founders. Bottom line: building your ecommerce product is cheaper than ever.
The Art of User Feedback (Without the Awkwardness)
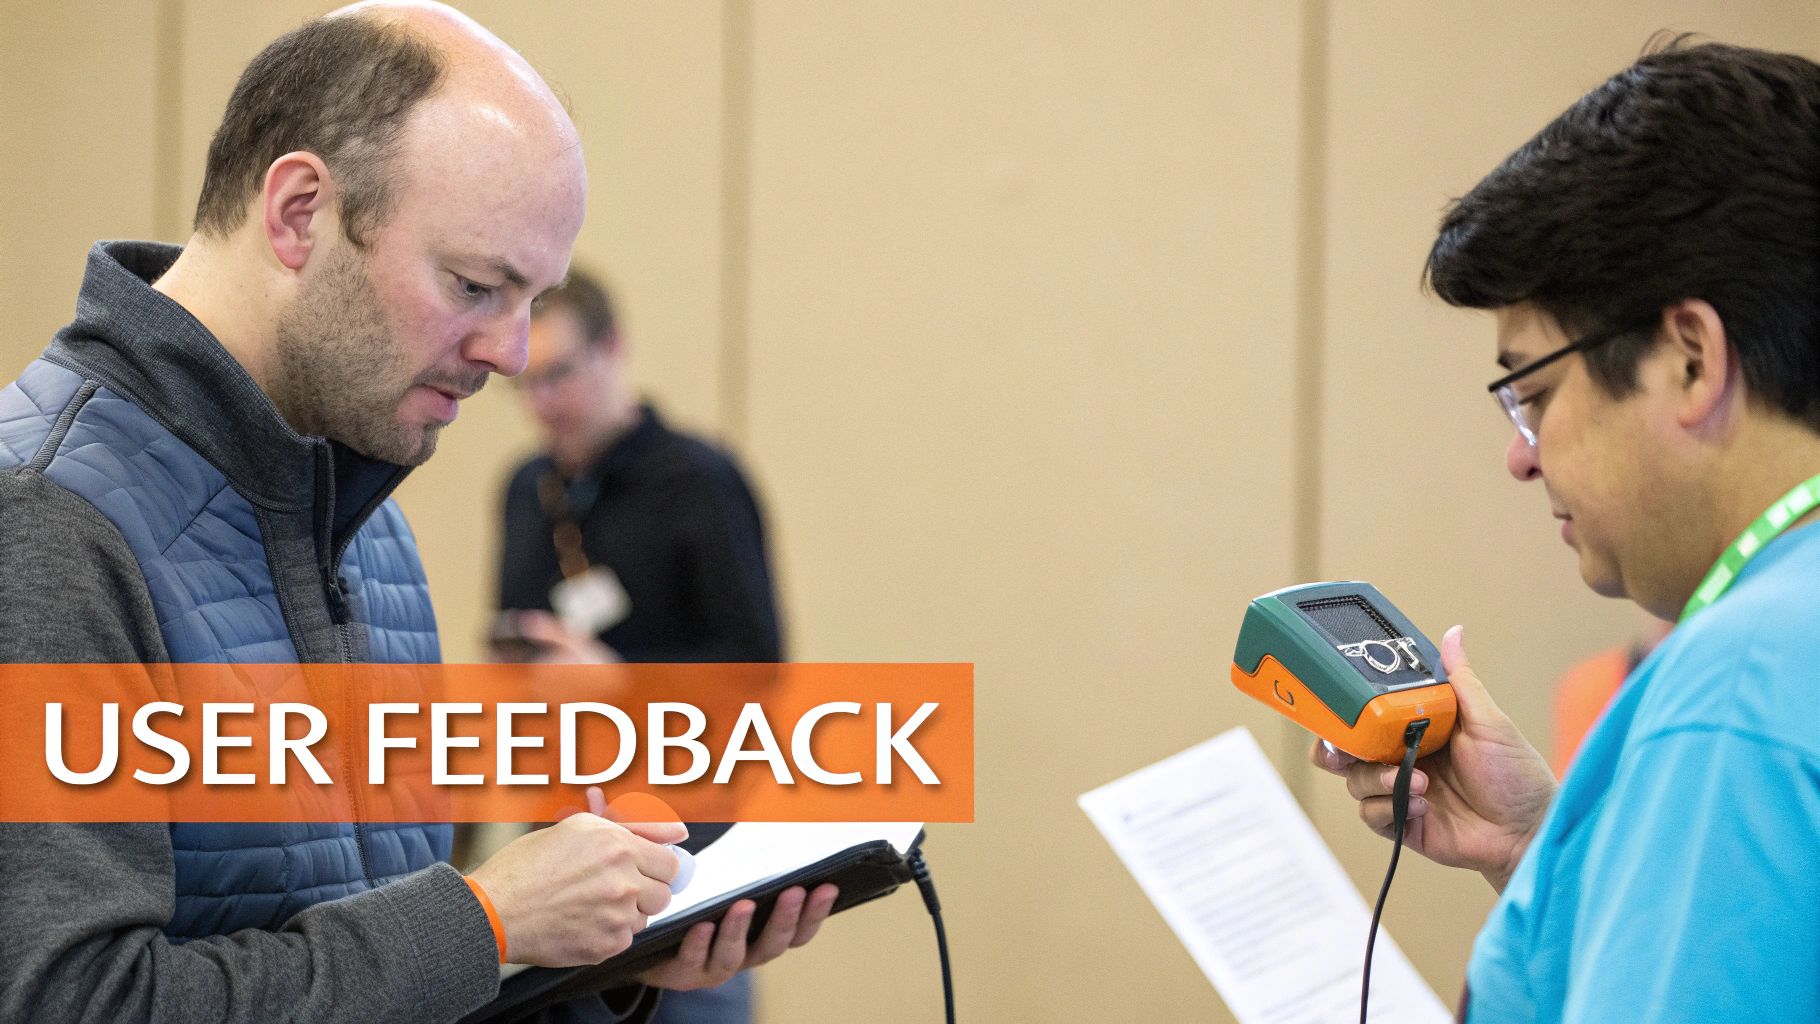
A prototype sitting on your desk is just a cool-looking paperweight. Its only real job is to get in front of actual human beings for feedback, but this is exactly where I see so many founders stumble. How do you get brutally honest opinions without getting defensive or accidentally leading the witness?
It’s an art, but one you can get good at fast. Your mindset shift is simple: your prototype is not your baby. It's a science experiment. Your mission is to observe, listen, and learn—not to sell, defend, or explain. Every bit of negative feedback is a potential disaster you just dodged down the road.
This is the entire point of prototyping a product in the first place—to de-risk your idea before you start spending real money.
Finding the Right People to Grill Your Prototype
First things first, your mom is not your target user. Neither is your best friend or your supportive spouse. They love you, and because they love you, their feedback is basically useless. They’ll tell you it’s brilliant because they want you to feel good.
You need strangers. More specifically, you need strangers who fit your ideal customer profile.
Here’s where you can find them:
- Go where they hang out: Building a tool for coffee shop owners? Spend a day at a local cafe and offer to buy someone a coffee for five minutes of their time.
- Use your network (carefully): Ask friends for introductions to people who fit your demographic, but be crystal clear you need their honest, unfiltered opinions. Tell them, "I need you to tell me why this sucks."
- Tap into online communities: Find relevant subreddits, Facebook groups, or Slack channels. Offer a small gift card for 15 minutes of feedback. Just be genuine and respect the community rules—no spamming.
The quality of your feedback is a direct reflection of the quality of your test subjects. Don't you dare cut corners here.
How to Ask Questions That Get Real Answers
Your most powerful tool during a feedback session is silence. Seriously. Your job is to hand them the prototype, give them a simple task, and then shut up and watch. What people do, their hesitations, and their frustrations will tell you far more than their words ever will.
The most valuable feedback comes from what a user does, not what they say. I watch for sighs, confused expressions, or where a finger hesitates. That’s where the gold is buried.
When you do ask questions, avoid leading them to the answer you want. Instead of saying, "Don't you think this button is easy to find?" try this: "If you wanted to save your work, what would you do next?" See the difference? One begs for agreement; the other prompts an actual, honest action.
This is even more critical for physical products. Getting something tangible into someone's hands is cheaper and faster than ever, thanks to new tech. The rapid prototyping tools market, valued at $14.25 billion in 2025, is projected to hit $36.01 billion by 2034. A huge driver of this growth is 3D printing, which can slash material waste by up to 40%, making it incredibly affordable for you to spin up testable models. You can learn more about how these innovations are changing product development.
Turning Vague Comments into Actionable Fixes
You're going to get feedback like, "I don't know, I just don't like it." This feels like a dead end, but it's actually an invitation for you to dig deeper. Your job is to be a detective.
Follow up with gentle, open-ended questions like:
- "Can you tell me more about that?"
- "What were you expecting to happen when you clicked there?"
- "What part felt the most confusing for you?"
By asking "why" in a few different ways, you can translate a vague feeling into a specific design flaw. "I don't like it" might become "I couldn't find the search bar," which is a problem you can actually go and fix. This is how you iterate effectively instead of just guessing.
How to Iterate, Fast and Smart
Building a product isn't a straight line. It's a messy, relentless loop: Build, Test, Learn, and Repeat. The founders who make it are the ones who can spin through this cycle faster than anyone else. Your first idea is almost certainly wrong, and iterating is how you stumble your way to what customers actually want and need.
The mindset here is everything. You absolutely have to fall in love with the problem you're solving, not your first crack at a solution. Think of your prototype as a learning tool, nothing more. Sometimes the most valuable lessons I learn come from watching it crash and burn in a user’s hands.
The Build-Test-Learn Rhythm
I like to think of this process like tuning a guitar. You play a note (build), listen to hear if it’s sharp or flat (test), and then twist the tuning peg (learn and iterate). You don’t just tune one string and declare the instrument ready for a concert. You do it over and over until every note sings in harmony.
Prototyping is exactly the same. Each round of feedback helps you dial in your product. The goal isn't to ship something perfect on day one; it's to ship something that's just good enough to get you the next critical piece of feedback.
I learned this the hard way on one of my first projects. We were so sure we had it right that we spent weeks building a beautiful, pixel-perfect digital prototype. When we finally put it in front of real people, it was a total disaster. They just didn't get it. We had to scrap the whole thing. It was a painful gut punch, but that early failure saved us from a massive, and very public, flop down the line.
Figuring Out What to Fix Next
After a user testing session, you'll be swimming in a sea of notes—some good, some bad, some just plain confusing. So, what do you actually change? You can't fix everything at once. You have to get ruthless with your priorities.
Here’s a dead-simple method I use to sort feedback into three buckets:
- Critical Blockers: These are the showstoppers. The issues that literally prevent a user from doing the main thing your product is for. If they can't figure out how to add an item to their cart, your e-commerce app is dead on arrival. You fix these first. No excuses.
- Major Confusion Points: These are the parts of the experience that cause sighs, furrowed brows, or frustrated clicks. Even if users eventually figure it out, the friction is high. These are your next priority because they kill user satisfaction.
- Minor Annoyances: Things like weird button colors, a slightly awkward turn of phrase, or a clunky animation. These are "nice-to-haves." Log them so you don't forget, but don't let them distract you from the real fires.
This simple sorting trick keeps you focused on what truly matters, making sure every new version is a meaningful leap forward.
Stop getting distracted by shiny objects or tiny aesthetic tweaks. Focus on fixing the one or two things that will most dramatically improve the user’s ability to solve their core problem with your product. That’s it. That’s the whole game.
Back to Building
Once you know what to fix, it’s time to get back to building—and you need to do it fast. This is where your choice of prototyping tools really shows its worth. If you’re using something flexible like Figma, you can often knock out the changes from a feedback session in just a few hours.
The speed of this cycle is your single biggest competitive advantage. While your competitors are stuck in endless planning meetings, you’re already on your third or fourth iteration, getting closer and closer to something people will actually pay for with each loop. This rapid, focused iteration is how you build a product that people genuinely love.
From Proven Prototype to First Production Run
You did it. After all the building, testing, and late nights, your prototype is finally getting rave reviews from real people. So, what's next? It's time to move from a one-off model to your first real production run.
This is the moment your scrappy prototype, maybe held together with a bit of duct tape and a lot of hope, meets the unforgiving world of manufacturing. The whole thing can feel overwhelming, but it's a completely manageable process once you know the steps. You've proven the idea works; now it’s time to actually build the business around it.
Thinking Like a Manufacturer
The biggest mental shift you need to make right now is to start thinking about Design for Manufacturing (DFM).
Here's the best way I can explain it: your prototype was like a custom-built race car, fine-tuned to win a single race. But a production-ready product? That needs to be like a Toyota Camry—reliable, affordable, and easy for you to build over and over again, thousands of times.
DFM is just the process of designing your product so it’s simple and cheap to make at scale. Fixing a design flaw when you're prototyping costs next to nothing. But one study found that fixing that same issue after you've launched can cost 10 to 100 times more. DFM is your insurance policy against that kind of pain.
This usually involves a few key things:
- Simplifying Parts: Can you redesign three separate components into a single piece? Every part you eliminate is a part you don't have to pay for, source, or assemble.
- Using Standard Materials: Sticking to common, off-the-shelf materials and parts will slash your costs. Don't reinvent the wheel if you don't have to.
- Designing for Assembly: You have to make sure a person or a machine can actually put your product together without tearing their hair out.
Finding and Vetting Your Partners
Once you have a DFM-optimized design, you’re ready to start talking to manufacturers. This isn't just about getting the lowest quote; it’s about finding a real partner who gets what you're trying to do and can grow with you.
Start by looking for factories that specialize in your type of product and, just as importantly, your production volume. Don't waste your time talking to a massive factory that makes millions of units a year if you only need 500. For a much deeper dive on this, check out our guide on how to find a manufacturer for your product—it has a detailed checklist.
When you approach a manufacturer, you’re not just buying a service; you're starting a long-term relationship. I pay close attention to their communication, their quality control processes, and how willing they are to work with a startup. A good partner will feel like an extension of your own team.
Before you even send that first email, get your technical package ready. This usually includes your detailed CAD files, a Bill of Materials (BOM), and crystal-clear specifications. The more prepared you are, the more seriously they’ll take you—and the more accurate your quotes will be.
Burning Questions About Prototyping
I talk to founders all the time who are wrestling with the idea of building a prototype. It always feels like this huge, intimidating hurdle, but it's usually not as scary as you think. Let's clear up a few of the questions that I hear over and over again.
"How Do I Know When My Prototype Is Good Enough to Show People?"
This is the big one. The answer is simpler than you think.
Think of your prototype as a key. You don't judge a key on how shiny or beautiful it is—you judge it on whether it opens a specific lock. Your prototype is "good enough" the moment it can unlock the answer to your single most important question.
- Need to know if people even understand your core concept? A sketch on a napkin is good enough.
- Need to see if they can actually complete a specific task? You'll need something they can click, tap, or hold in their hands.
Stop chasing perfection. The only goal here is learning, not launching a finished product. The sooner you get that rough prototype in front of a real human, the sooner you start learning what actually matters.
"I Can't Afford Fancy Tools. What Are My Options?"
You have way more options than you realize. I promise you, resourcefulness will always beat a big budget in the early days.
For physical products, don't you dare overthink it. Start with stuff you can find anywhere: cardboard, foam core, hot glue, and tape. For digital ideas, the free versions of tools like Figma are unbelievably powerful. You can build a surprisingly realistic digital mockup without spending a dime.
Even better, look for local resources. Most cities have makerspaces where you can get access to industrial-grade gear like 3D printers and CNC machines for a small membership fee. It's a game-changer.
"What Is the Biggest Prototyping Mistake I Can Make?"
Hands down, the biggest mistake is waiting too long to start. I see founders get stuck in "analysis paralysis," trying to map out every single detail in their heads.
Prototyping is all about doing. You can't learn anything until you build something real, no matter how rough and ugly it is.
The second biggest mistake I see? Getting defensive when you get feedback. Your prototype is not your baby; it's a science experiment. You have to be totally okay with watching it fail, because that's how you learn enough to eventually succeed.
If you’re a founder in the Midwest looking for honest feedback and a real community of builders, check out Chicago Brandstarters. We’re a free, vetted group for founders who value kindness and hard work. Learn more and apply at https://www.chicagobrandstarters.com.
Leave a Reply